A revolutionary product for corporate as well as students!
Adobe has launched its newest tool named as Adobe Document Cloud. This application lets you snap a picture of the document, save it to the cloud as a PDF, edit it, sign it and protect it using a password. All of this can be done using the mobile phone. This application is built with a touch enabled interface and consist of Photoshop imaging tools, adobe acrobat and adobe e-sign technology. It is available in a free Reader version, a standard version, and a Pro version that you can upgrade to. This can be a boon to business users.
Design
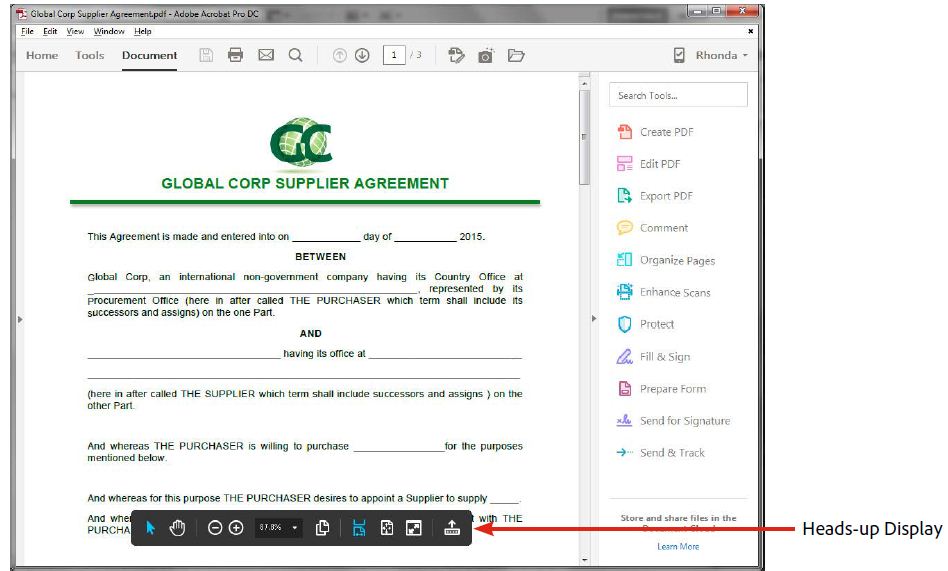
The adobe cloud looks really simple. Designed with a blank background and pastel color buttons. However, apart from the simple design the Adobe cloud is a pleasure to use. On the desktop screen, you have certain documents which are already saved to the system. Once you’ve selected the document to work on, you will be taken to a screen where you will see different page options and a toolbar with options that include turning the document into a PDF, editing, exporting, commenting and e-signing. Each option has its own colorful icon and a text label, to make your life easier.
The text button is provided at the top of the page which helps you to return to the homepage or enter the neat Adobe tool tray. Other options like save, print and search are also provided and you can save the document locally or on cloud.
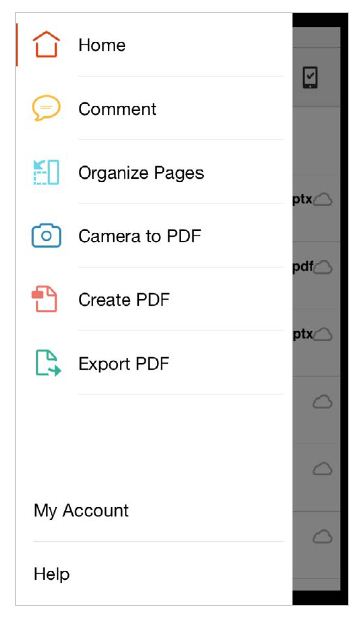
The mobile environment is much more bare bones. On the home page I’m shown a list of available documents, as well as a search box where I can look within documents to find a given phrase, and a red home icon. When I click the home icon I am given the following options: comment, create PDF, export PDF, camera to PDF and organize pages. I am also provided with text buttons to access my account or ask for technical support.
Features:
There are new features incorporated in the Adobe DC.
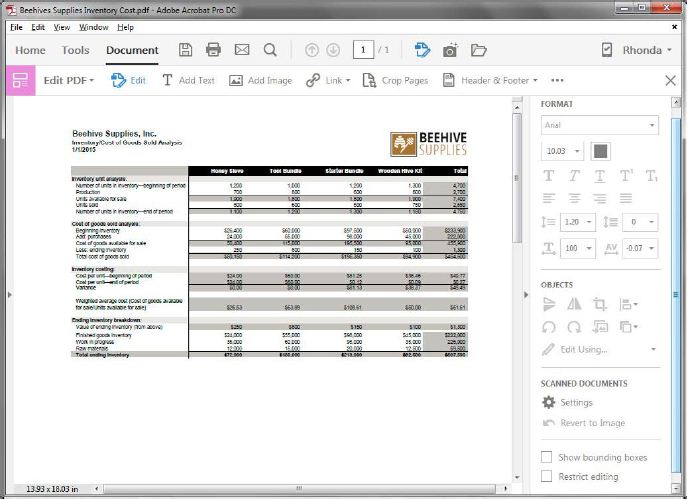
- Different tools appear in the right pane and the top of the window depending on whether you’re creating a PDF, editing a PDF, and so on. Download any file and then open it in Adobe DC. It will e converted into PDF. To edit the PDF all you need to do is click on Edit PDF at the right panel. Editing tools are located in the right pane across the top of the screen. Click the Edit button at the top, and change one of the spreadsheet values. After making all the changes you can select to export PDF and another set of tools will pop up.
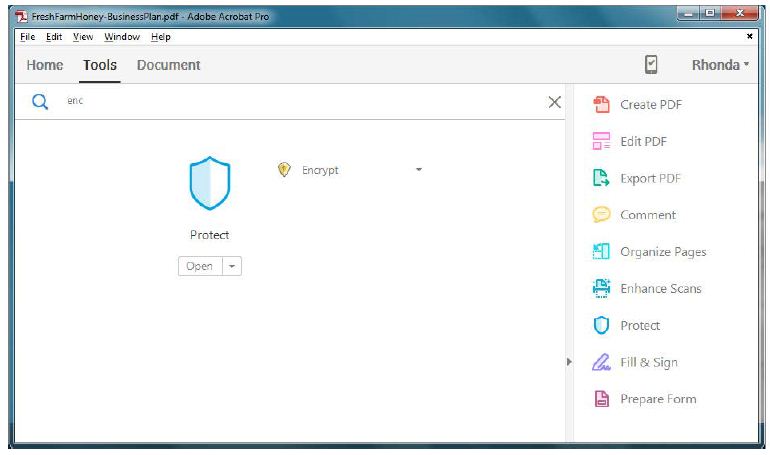
- Search the tools by name: You can always select a tool by searching it which will save your time. All you need to do is to Select the Tools menu on the menu bar and type a tool name. The tool will appear on the new screen, click and use that tool in your opened document
- Customize the toolbar as per your convenience: Go to the tools menu, and keep the shortcuts that you want. To delete the rest of the unwanted items just hover the mouse on them and click X. You can always restore the shortcuts by opening the tools menu and choosing add from the drop down menu.
- Heads up display: s. Hover the cursor at the bottom of the screen to view the heads up display. Drag it to the top of the screen if you want to change the place.
Prepare and Share
You can prepare your documents on the go using the mobile application and also share them with your clients or customers hence, no waiting till you get to office. This is how you can do it
- Open the Adobe Acrobat DC app on your tablet or smartphone. the tools are mostly same from Desktop to Laptop.
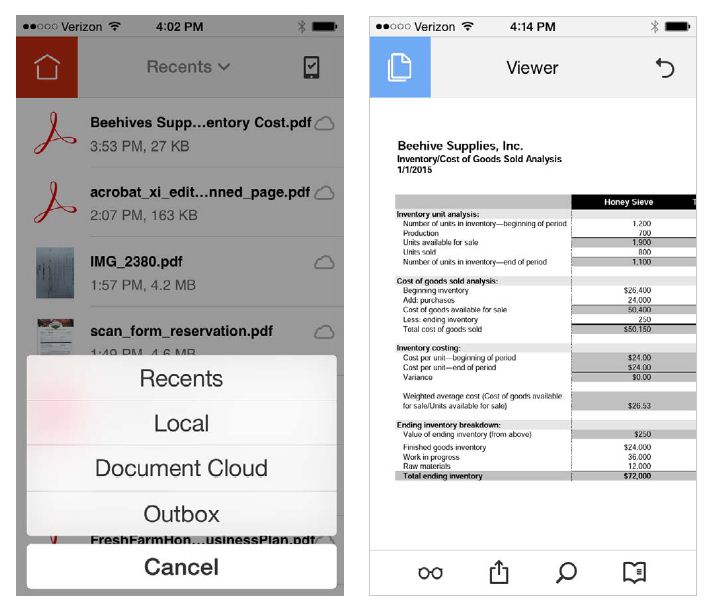
- Tap the red Home icon at the top. Then tap Recent (to the right of the Home icon) to see other file locations. Select Document Cloud, and sign in with the Adobe ID you created for your reviewer’s account.
- The list of files stored in Adobe Document Cloud will include Bthe pdf file.
- Click to open the file.
- Commenting is free with Acrobat DC. Tap the Home icon at the top left, and then touch Comment to try it out.
- Touch the share icon at the bottom of the screen to email the file to your customer.
Recycle any document and edit the PDF:
Now you can convert the documents into PDF more easily and you don’t even have to change the font because Adobe DC will automatically create the font on the system matching to that of the document.
Edit the PDF :
- Open Acrobat DC on your desktop
- Open the sample file. Acrobat DC automatically converts it to a PDF
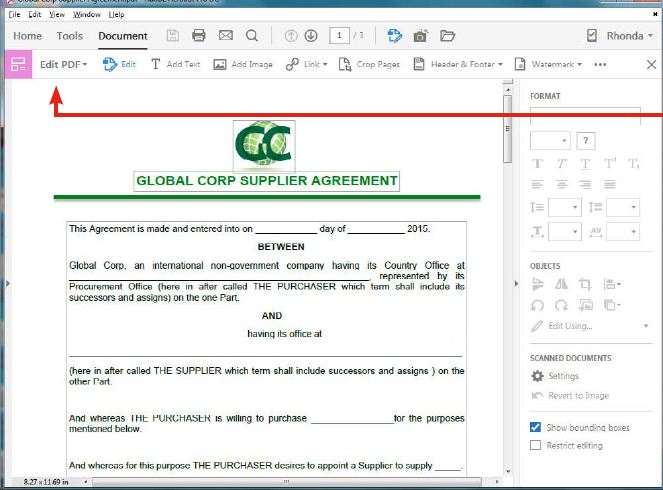
- Select the Edit PDF tool on the toolbox right hand side.
- Click the Edit tool in the top menu bar. You’ll see a notice that the text has been recognized as
- ‘English (US)’. To continue, click Do not show this again.
- Acrobat DC automatically converts the scan to editable text and images.
- Click in any box and edit the text. To expand the text box, just drag the handles.
Fill & sign
It’s easier than ever to convert a paper form or Word file into a fillable PDF form, and then to collect information electronically. Here’s how to do it:
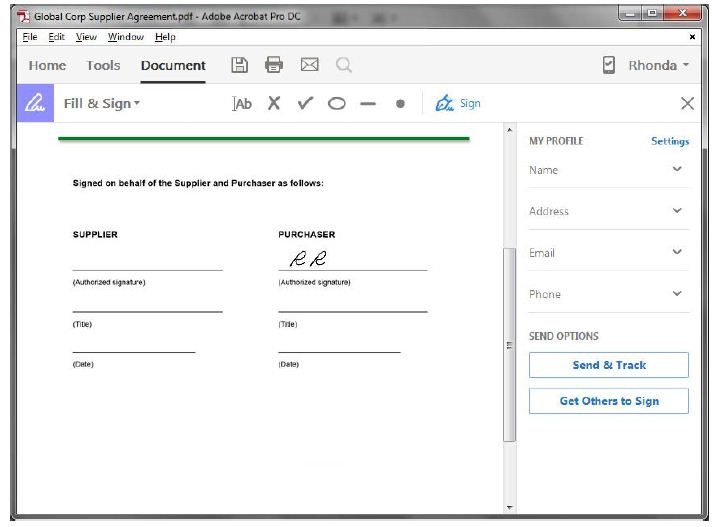
- Open any PDF or scanned document file with a signature line. Or just use the Global Corp Supplier
- Agreement.pdf file included in the prerelease samples.
- Select the Fill & Sign tool in the right pane.
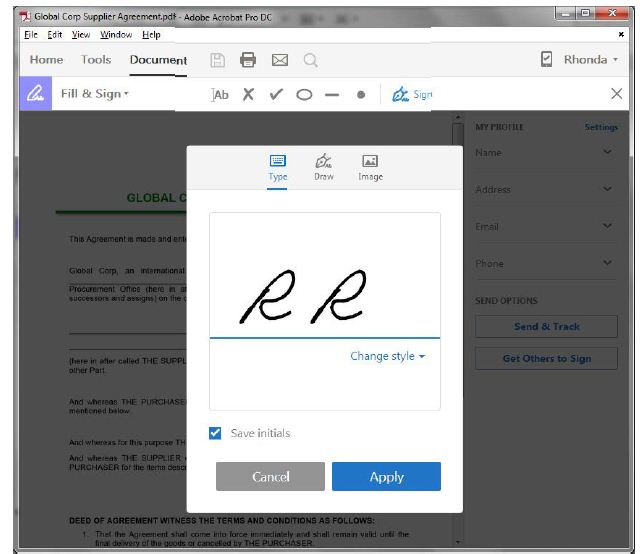
- Scroll down to the signature line. In the sample file, it’s on page 2. Click the Sign command in the menu bar at the top. Select your signature or click Add Initials. You can choose from several styles.
- Move the cursor to where you want your signature to appear, and just click to sign.
- Now click Get Others to Sign in the right pane, under Send Options. Then click Ready to Send. You’ll
- be prompted to enter the signers’ email addresses. Enter them in the order you want people to sign.
- After the first person signs, the second person on the list will receive the document. After the second person signs, the third person will receive it, and so on.
- Click Send. You’ll receive an email confirming that the file was sent, with the file attached.
- To see which documents are waiting for you and others to sign, click Manage Documents.
Verdict:
Document Cloud’s is a wonderful tool to use for business purposes. The positives definitely outweighs the flaws (there are hardly any). Adobe has turned the document management process into a simplified form. Handling PDFs before and after Document Cloud is almost like editing photos before and after Photoshop. The ability to sign PDFs via mobile device, turn paper into PDFs via your phone’s camera, and share a PDF via a link is amazing and a boon. Do your work on the go.
